72 files all with the aim of helping you to hold / support sheet materials leaving your hands free to apply screws or nails.
I originally designed this full set with the aim of it being all about drawer box assembly, to make it quick, repeatable and stress free. During the design and testing process I quickly realised that this set of jigs is far more versatile and can be used for larger or smaller projects.
There are a number of different permutations of the files to cater for different sheet material thicknesses, including the most common. And a fully adjustable support jig with sliding jaws for the non standard jobs.
Please note that the corner, t joints and triangle joints all have the same thickness of base to ensure they are compatible with each other.
Below I have put the description for each folder of files and the settings I used to print them in PETG HF on my Bambu Lab 3D Printer. You may find you need to adjust the settings for your needs but they will be a good guide.
File 1 - Corner Braces - 4 walls, 25% infill, no supports.
Also labeled as corner clamps. These simply slot over the corner of the 2 boards you wish to join. There are 6 different sizes for the following thicknesses of materials. 10mm, 11mm, 12mm, 13mm, 17mm and 18mm
There is a large and small for each size too. Meaning you can have more strength for larger panels.
I apply one top and one bottom for total stability.
File 2 - Drawer pull templates - 3 walls, 25% infill, no supports.
Save on drawer pull hardware.
11 styles of template designed to be used with a router. Simple set the location where you want to remove finger space on your drawer front. Locate the template using the 2 tabs and trace the area to be removes.
Then cut to within 1 to 2mm of the line, reapply the template, fixing it with either clamps or good double sided tape. Then using a bearing guided flush trim router bit, with the bearing following the template remove the remaining material. Taking care to follow all safety requirements.
File 3 - One handed corner clamps - 4 walls, 40% infill, some supports.
These are designed to be added to squeeze clamps, simply remove the inner jaw rubber that the clamps come with and replace with these prints. Then you can quickly clamp a corner of 2 boards. Note that this is not a solution for glue ups, just for quick hold to give you 2 hands free to apply fixings.
There is one top jaw addition, a simple triangle.
There are 4 designs for the bottom. I have specifically made the one called best design to not need supports and to be the largest and strongest. It is the one I recommend as the others need supports and are not as strong.
If the prints are too tight or loose simply scale to fit.
File 4 - Sheet Material centre scribes - 3 walls, 20% infill, no supports.
The simplest and one of the most useful.
When driving screws or drilling into a Butt joint it is really handy to know you are hitting dead centre of the board that will receive the screw thread to avoid splitting.
These simple prints make that easy. There are 2 styles, one for thin leaded pencils or pens and one for the thicker Pica or Tracker style ones.
There are 6 holes on each print aimed at either 12mm or 18mm sheets with 1mm ± either side. thats ½ and ¾ inch sheets in imperial.
File 5 - Right angle blocks - 3 walls, infill depends on the file you choose, no supports.
These are just clamping right angles. So useful and simple in their job.
There are 3 sizes, each with 4 iterations.
Small, medium and large. Each one designed for different sized glue ups.
Each size has 4 iterations,
No support
Support
Skinny, no support
Skinny Support.
The idea here is that if you want to save filament then print with a support as this adds another bar across the bracket.
Personally I find the skinny ones to be just fine with 4 walls and 40% infill, but the non skinny offer more clamping space, though it comes at a cost of filament and time.
The non skinnys were printed with 4 walls and 30% infill.
File 6 - Sliding clamps.
All pieces but the bolt are 4 walls and 25% infill
Bolt is 4 walls and 90% infill to avoid snapping.
The only piece needing supports is the track due to the dog holes on the underside.
This was a whim that turned into one of the most useful additions in the files.
The aim here is to have a fully adjustable clamp that you can glue a dog hole into to allow it to be set into a workbench. Allowing you to clamp a board on its edge to do jibs like applying edge banding.
They can adjust from thin to well above 2 inches, 36mm and with the larger jaw option the board height can go up to at least 500mm.
Slide the locking bar into the track, place the jaw so that the holes align and apply the bolt. Tightening the bolt draws the bar into the jaw and locks it into the track.
If the bolt snaps which I found happened in early iterations of the design, ensure it is cool and not right after printing, and set the infill to 100% if needed. This should be enough to get the desired tension without snapping the bolt.
If you have a standard cmc cut mft workbench then the dogs are perfectly aligned. If, like me you have drilled your own, I advise just using one dog to stop the clamps sliding.
File 7 - T-joint supports - 3 walls, 25% infill, no supports.
Much like the corner braces, these are designed to sit on a piece of sheet material where a T joint is being made. Use the centre scribe to mark the board being added in. Not the one you are sitting the t brace on, then use the viewing window to line the centre line with your mark for alignment.
There are 6 thicknesses of materials that these are compatible with. 10mm, 11mm, 12mm, 13mm, 17mm, 18mm. and each thickness has 3 sizes. There is the larger option both in low and high. And my favourite for smaller jobs the mini.
Note, these can also be used as corner braces in a pinch.
File 8 - Simple triangle supports - 3 walls, 25% infill, no support.
Align the print so that the triangle support is not upright, rather lying on its side to avoid supports.
These work with the corner braces and t joint supports to hold sheet materials while you use 2 hands to apply fixings.
These are designed to hold each board upright with speed and strength.
They also have the same base thickness so that they are fully compatible with the corner braces and t joint support.
If you have read this far, thank you so much. I appreciate you for even considering these files. If you have questions about printer settings or the jigs/files themselves please see the latest video on my page. Linked here.
https://youtu.be/jDvmnjlwDaY
I hope you get value and they prove to be useful !
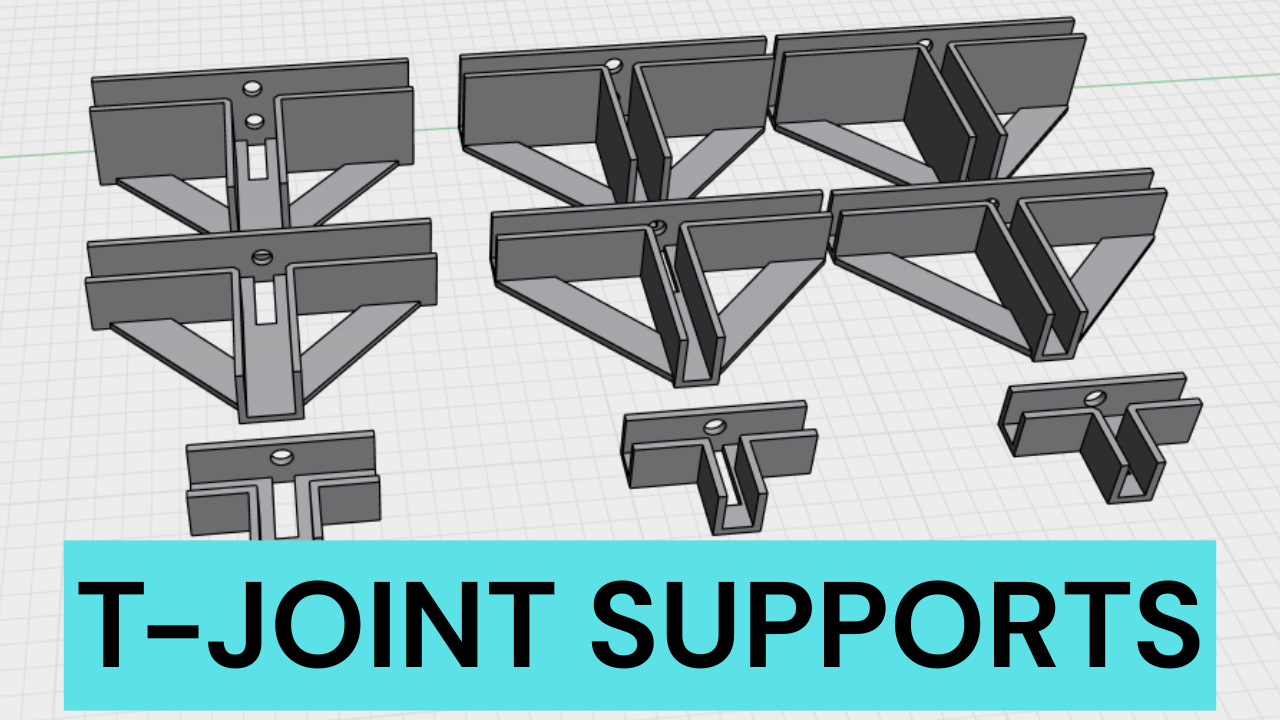 Image 1 of 16
 Image 2 of 16
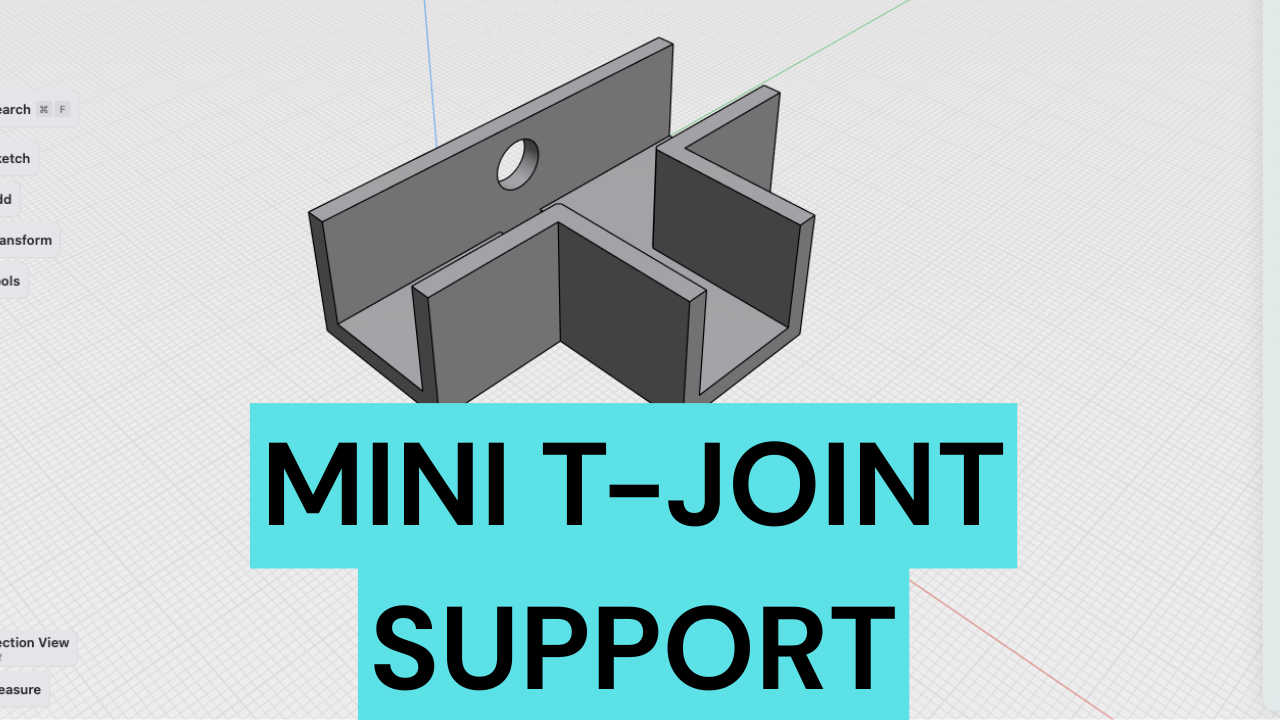 Image 3 of 16
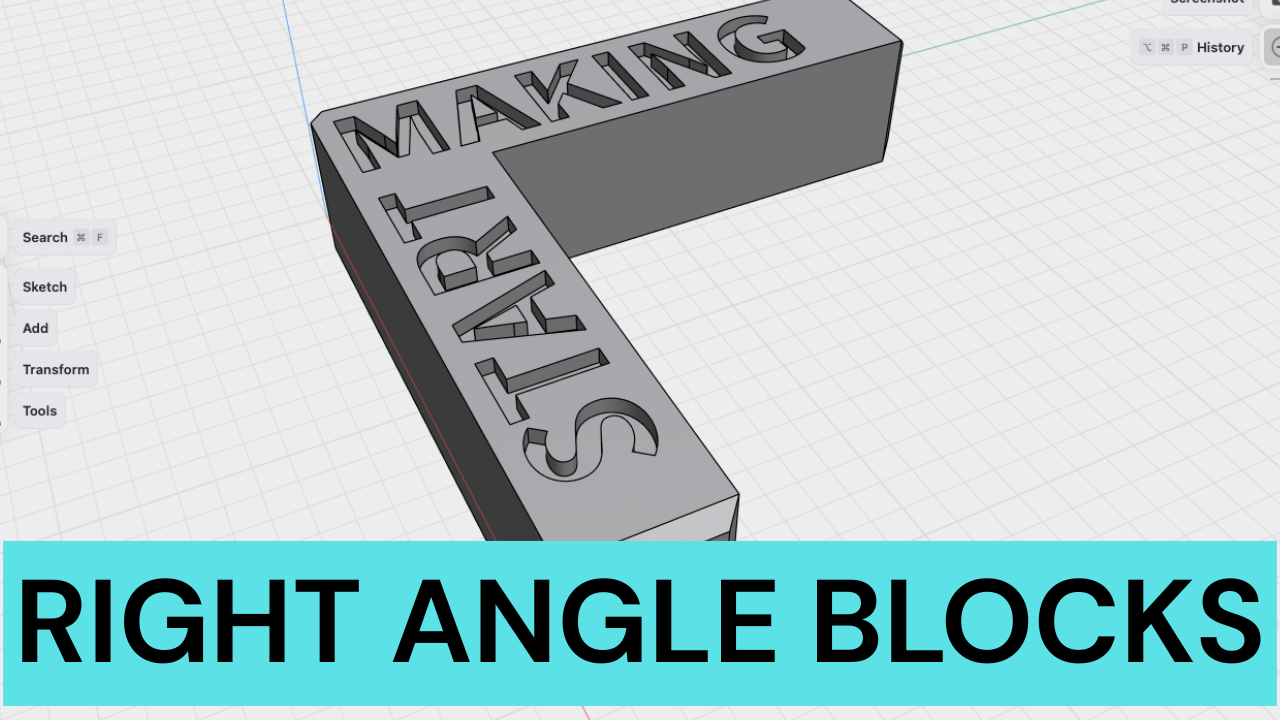 Image 4 of 16
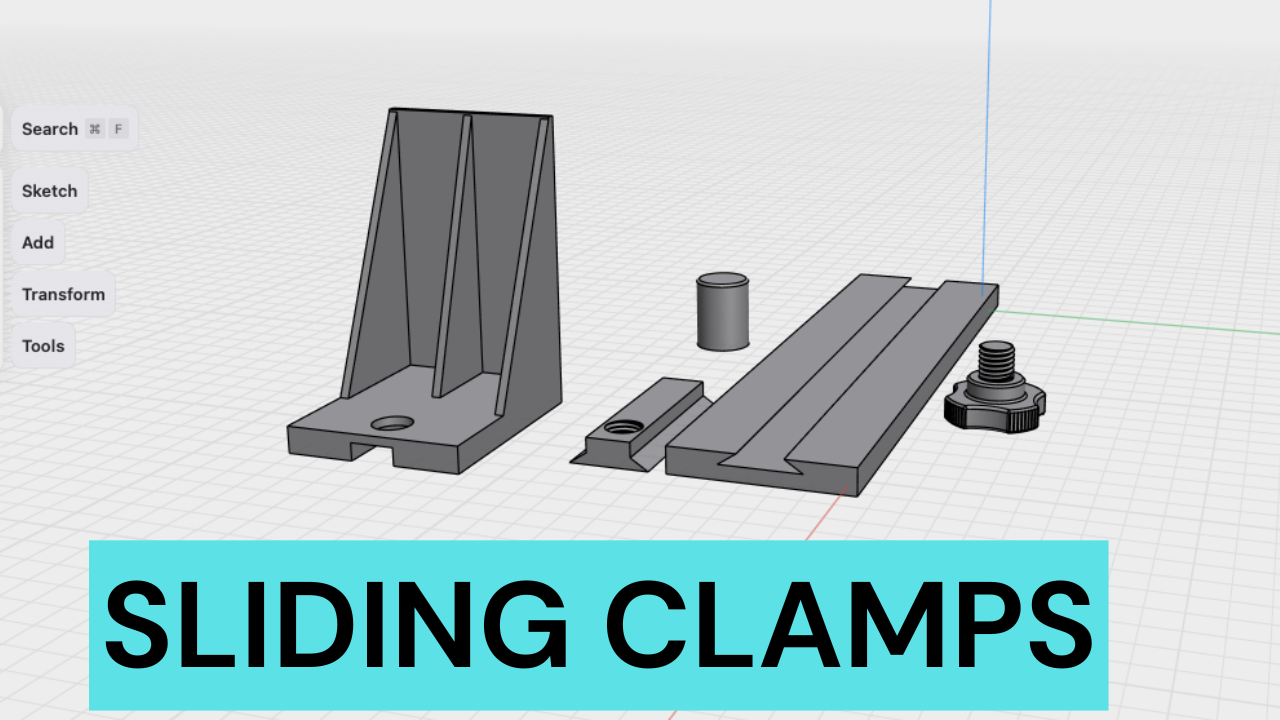 Image 5 of 16
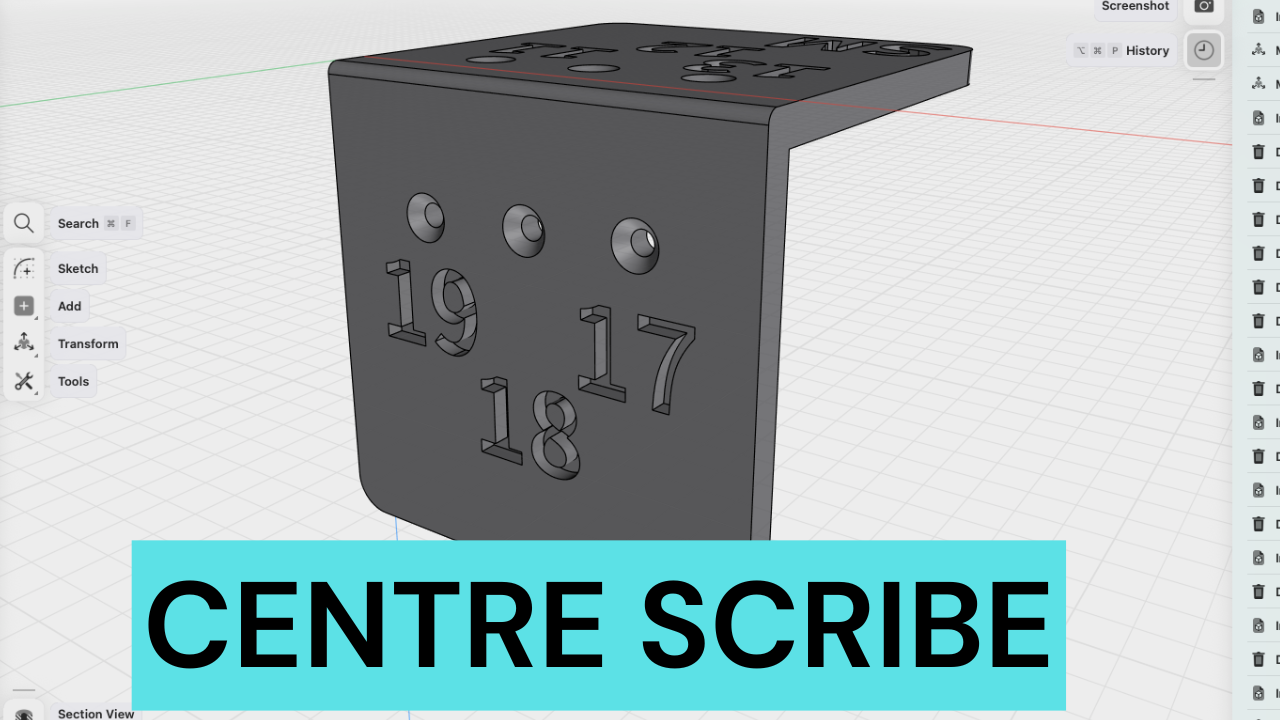 Image 6 of 16
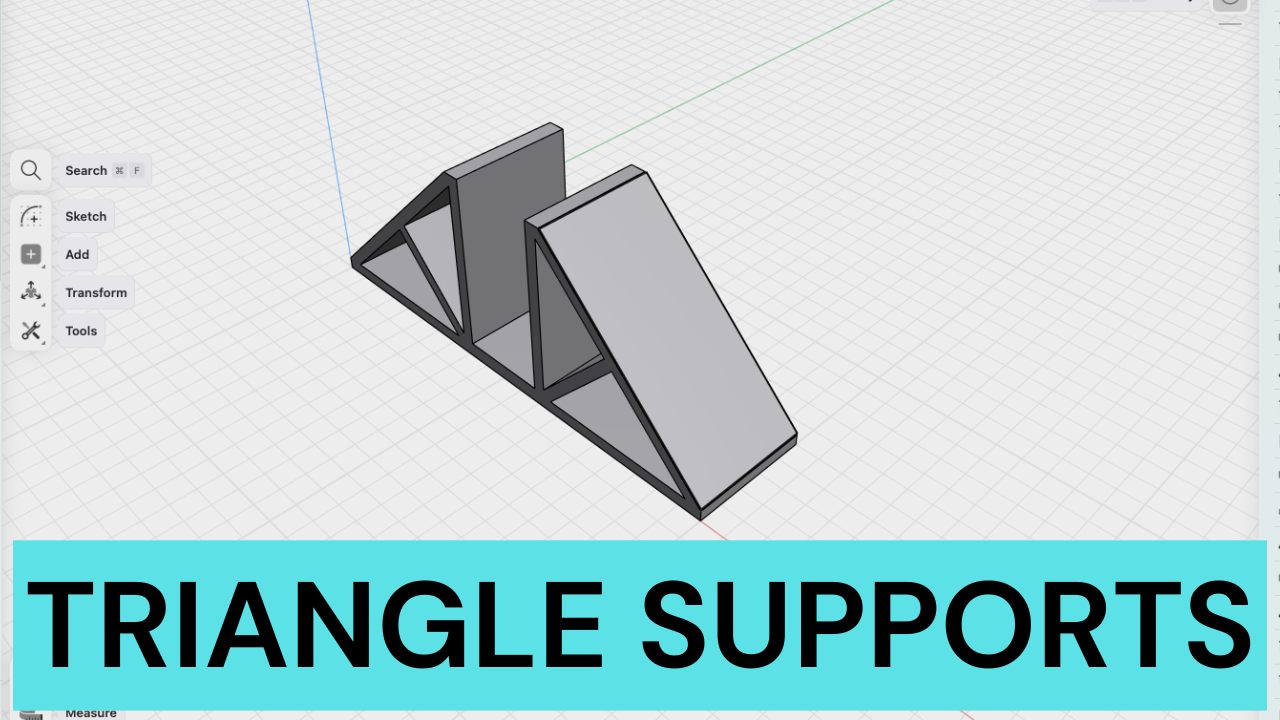 Image 7 of 16
 Image 8 of 16
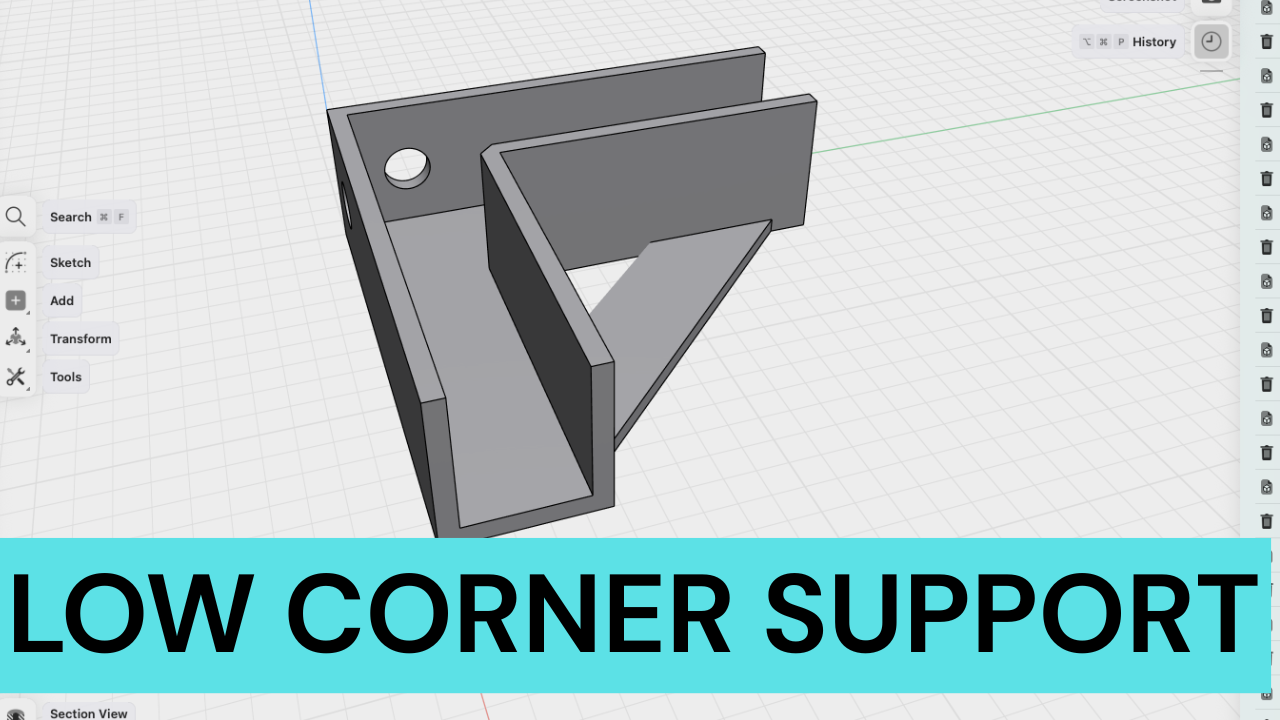 Image 9 of 16
 Image 10 of 16
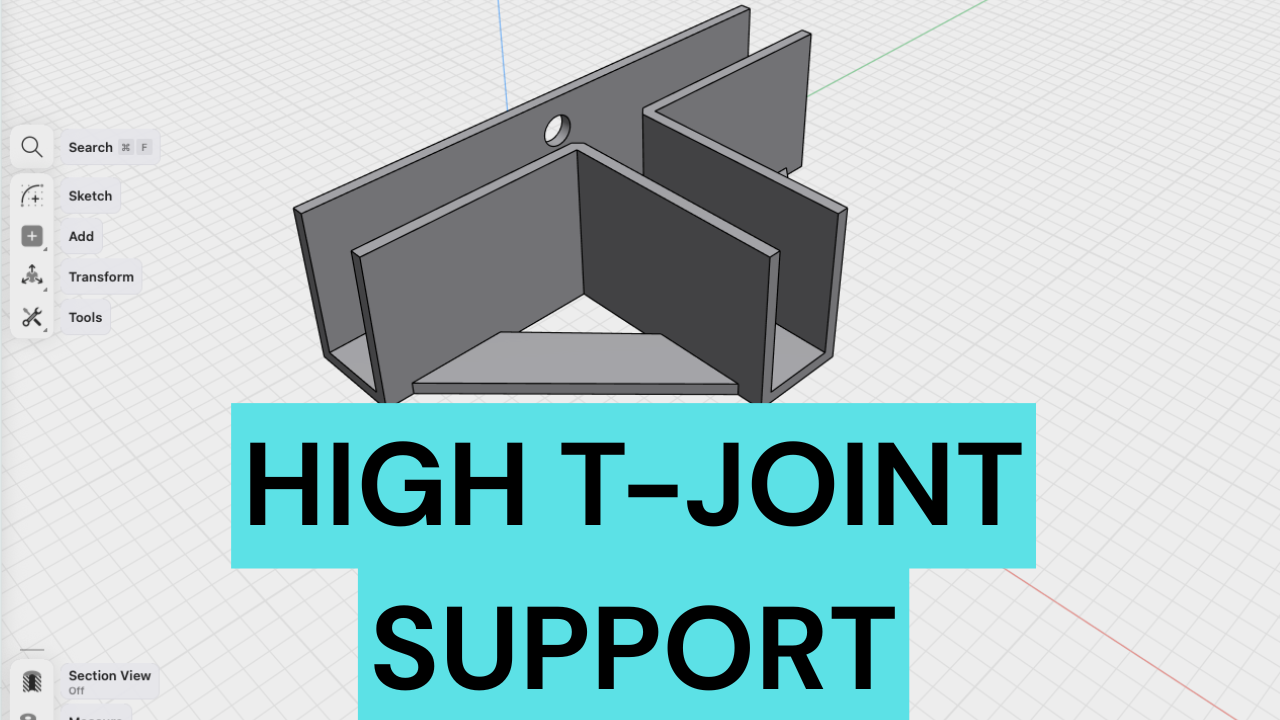 Image 11 of 16
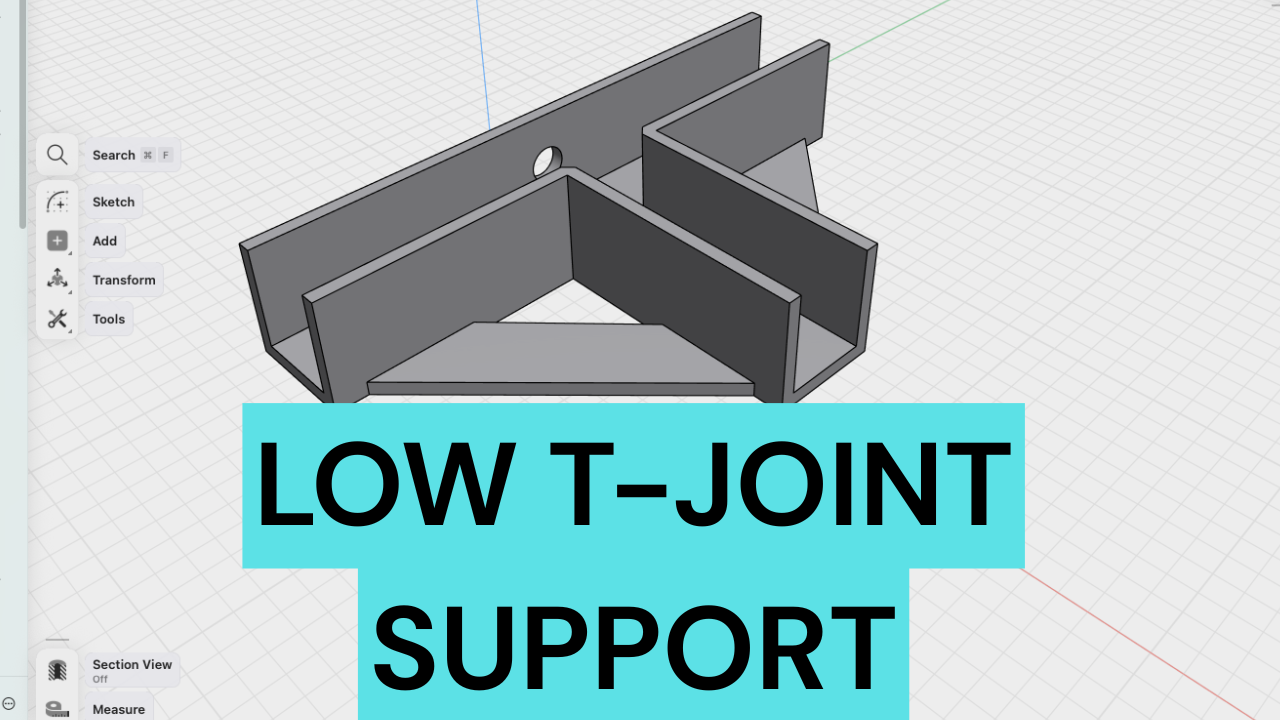 Image 12 of 16
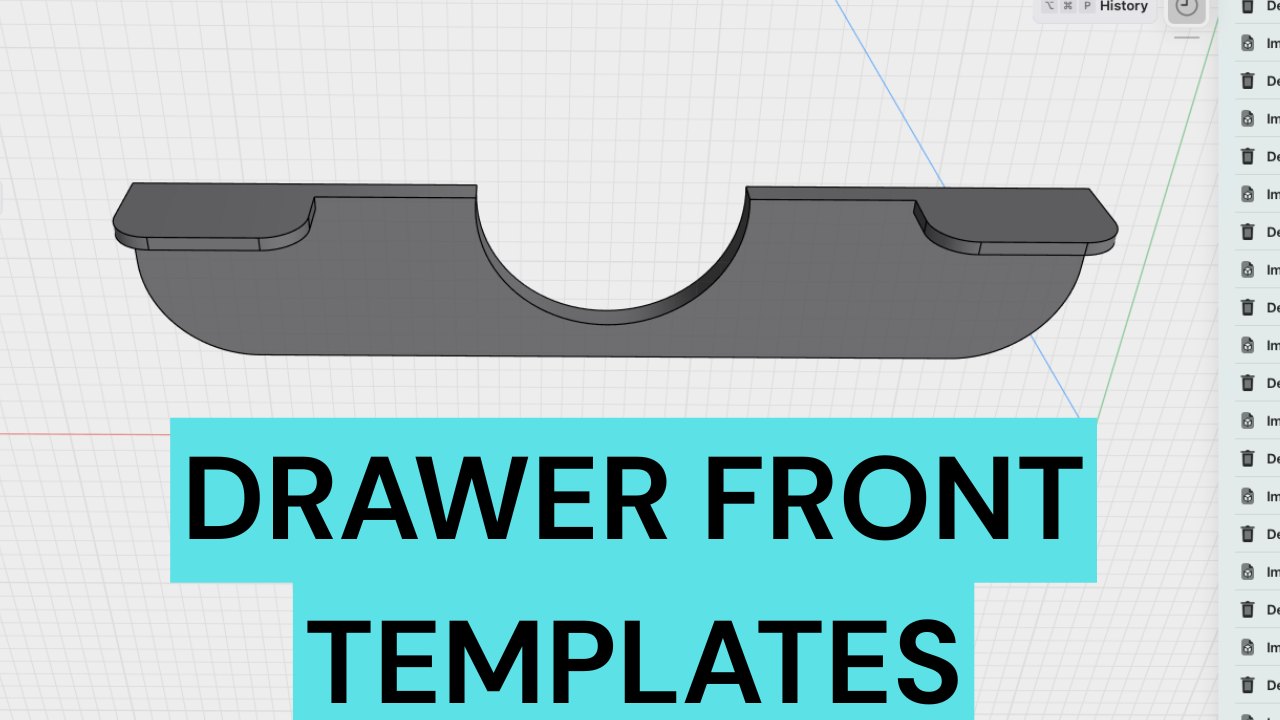 Image 13 of 16
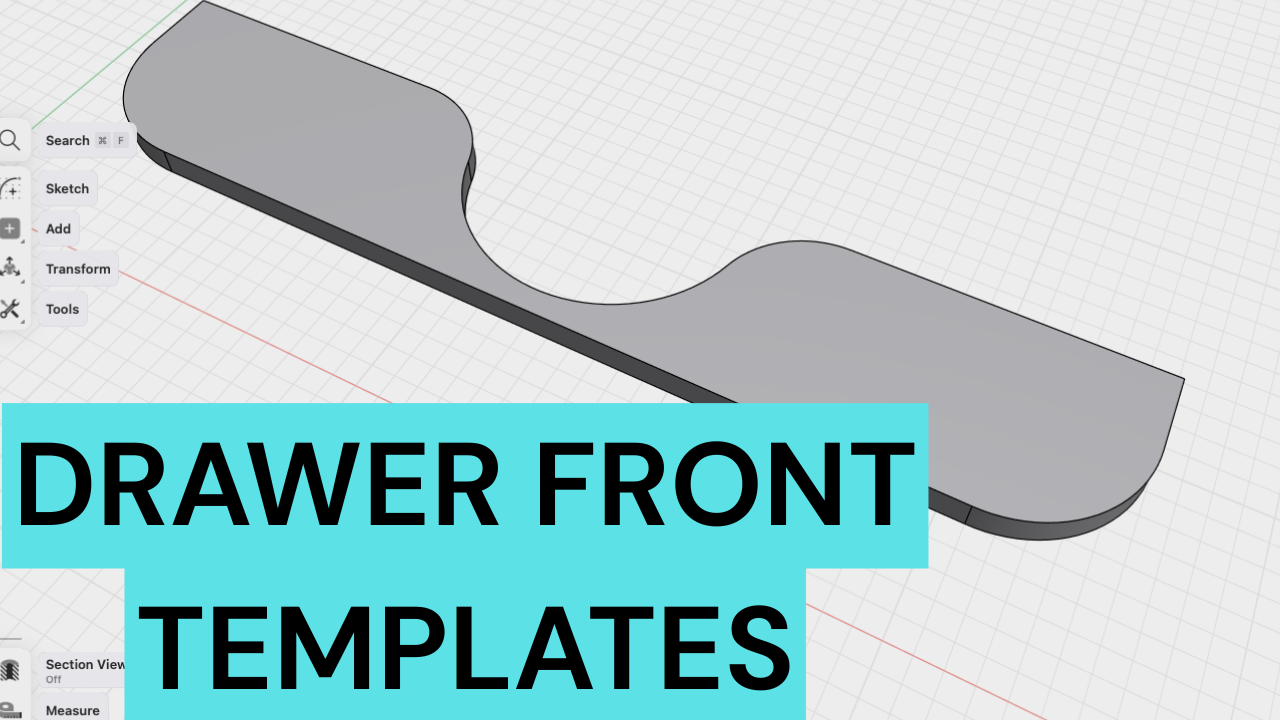 Image 14 of 16
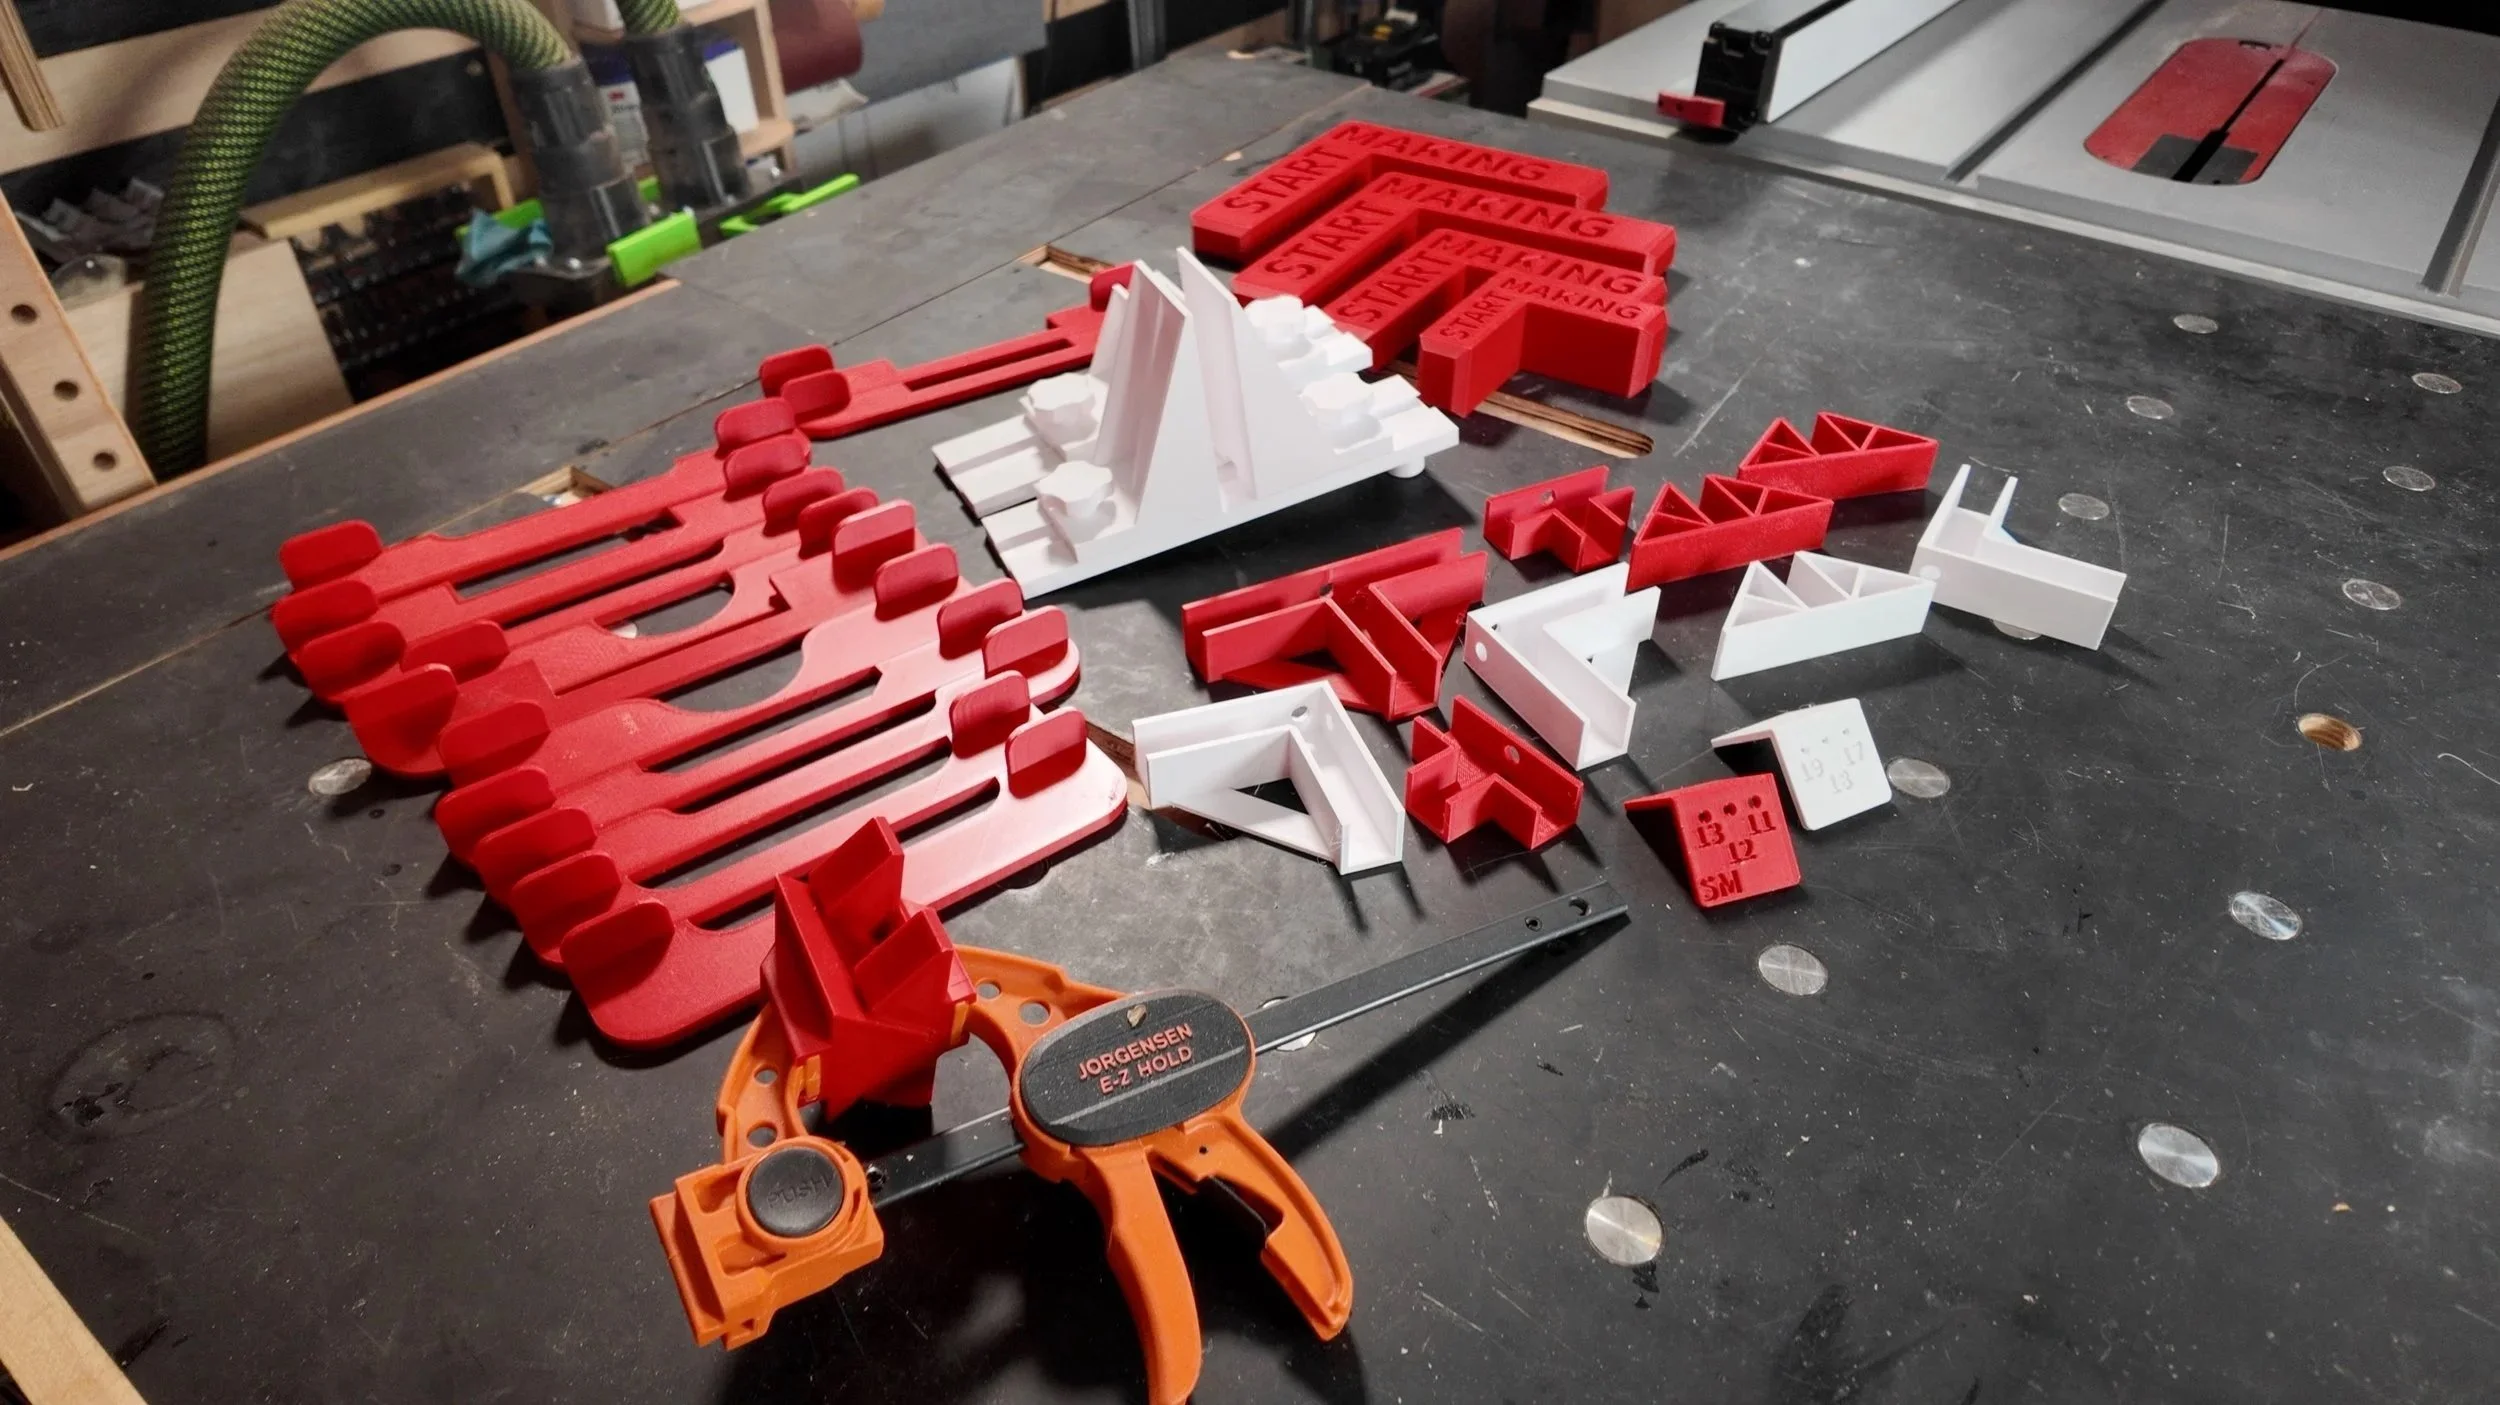 Image 15 of 16
 Image 16 of 16