Sale Price:
£6.00
Original Price:
£8.00
This is the Version 2.0 of the Siding panel clamps. You can find the original in this bundle.
Please note that the parts are not interchangeable due to this being enlarged to cope with the larger hardware.
https://www.start-making.com/3d-print-files/p/sheet-materials-assembly-jigs-full-bundle-72-stl-3d-print-files
The aim here is to have a fully adjustable clamp that you can glue a dog into to allow it to be set into a workbench. Allowing you to clamp a board on its edge to do jobs like applying edge banding.
They can adjust from thin to well above 2 inches, 36mm and with the larger jaw option the board height can go up to at least 500mm.
Slide the locking bar into the track, place the jaw so that the holes align and apply the bolt. Tightening the bolt draws the bar into the jaw and locks it into the track.
I have taken the time to adapt the weak areas of the original, though it is perfectly capable of doing a good job and the bundle that it is included in provides many other items and for that reason offers greater perceived value.
All pieces but the bolt are printed with 4 walls and 25% infill
You will find many versions of the bolts, or screws as the files name them. The only one needed to be printed with 90% infill is the full M12 bolt.
The others are designed to be printed in the recommended alignment in order for the alignment to provide enough strength to mean 25% infill is enough.
Heres what it is and what’s been improved.
File 1 - Jaws
There are 2 main jaws, large and small. Both come straight with small or large holes depending on the method of locking, see below.
The large jaws also offer a tapered option where the top 10% is tapered to allow ease or locating the jaw should you want to do multiple boards without fully loosening the clamps.
File 2 - Locking bars.
The bar is determined by the style of locking used. The original had a 3d printed M12 bolt and there is a bar with a printed thread to match.
There are bars with 3 differing sized holes to allow you to add in a threaded insert after printing the bar. Use this with hardware such as star knobs (male)
All hardware suggestion are at the end along with the link to the video showing the entire clamp upgrade.
There is also a bar with a hexagon recess on the underneath to allow for an M6 bolt or nut to be recessed. the nut can be used with a star knob (male) the bolt with a star knob (female) This latter one is my preferred method of all. (though 3d printed bolts are fun, see below)
File 3 - Locking screws.
Multiple options here all used with the 3d printed thread locking bar.
1 - The original 3d printed M12 bolt. Ensure you do one of the following for strength.
Print upright, 90% infill
Print at 45 degrees or full 90 degrees to base 25% infill
Add in a 90% Modifier along the thread so strengthen. (all details in video linked below)
2 - 2 halves - This allows you to print the bolt in 2 halves, each one lying flat for strength. They can then be glued together.
3 - Screw inner third only - less filament and more strength as it is printed flat. I like this option.
4 - Screw with cross removed - Clever but weaker than other options.
5 - Screw with split and bar - Clever again and easier to align than the 2 halves. But you need good tolerances to ensure a good fit.
My personal recommendation in the video is if you re to print then either do the full bolt and align it flat (the weakest way), then add in a 90% modifier or print the inner third only screw flat on your print bed.
File 4 - Tracks
This is a larger track than the original (wider) to incorporate the larger pieces.
1 - just a track with 3 dog holes spaced at 96mm centres. For those people with cnc cut mft tops.
2 - Track with one dog set to slide to cope with slight discrepancies with drill located holes of you have drilled your own dog holes into your work bench aiming at 96mm centres.
When printing these items please allow supports on the tracks and if you align any bolts to 45 or 90 degrees. Also the bars with recessed hexagons need supports too. The tapered jaws work best with supports, how you align them is up to you, I got best results with the tapered surface on the bed.
Other jaws I have the face that meets the wood on the bed.
If you would like to refer to the videos please see the Link below.
Video 1 - https://youtu.be/jDvmnjlwDaY
Here are the hardware links. Please note that they are affiliate links and as such the channel makes a small commission at no cost to you.
Nitrile bonded cork for grip on the jaws.
UK LINK -https://amzn.to/3Qokaad
US LINK - https://amzn.to/4bCD1mW
M6 Hex bolts 6mm x 25mm
UK LINK - https://amzn.to/4dXrbaY
US LINK - https://amzn.to/3SsUIRm
M6 Nuts
UK LINK - https://amzn.to/4estTFE
US LINK - https://amzn.to/440rVWR
STAR KNOBS M6 (male)
UK LINK - https://amzn.to/43V7tXu
US LINK - https://amzn.to/4dUEdGe
STAR KNOBS (female)
UK LINK - https://amzn.to/4g8cC5L
US LINK - https://amzn.to/4uZkb3u
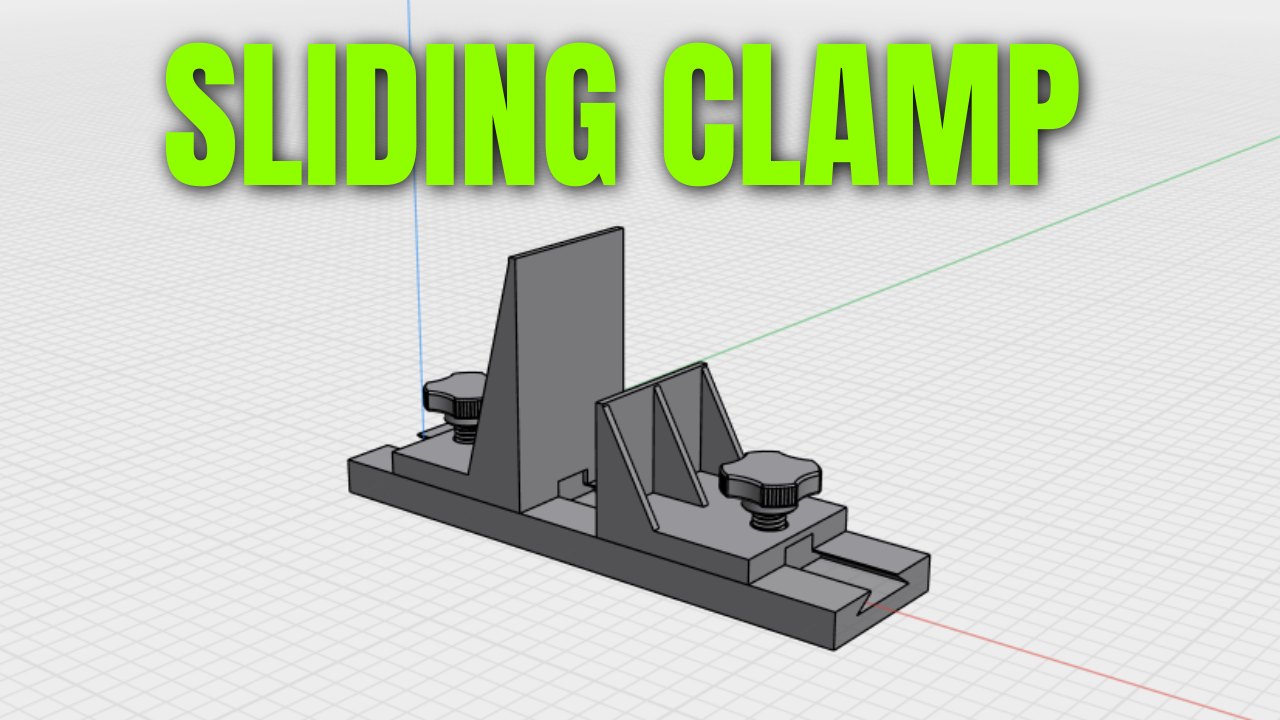 Image 1 of 10
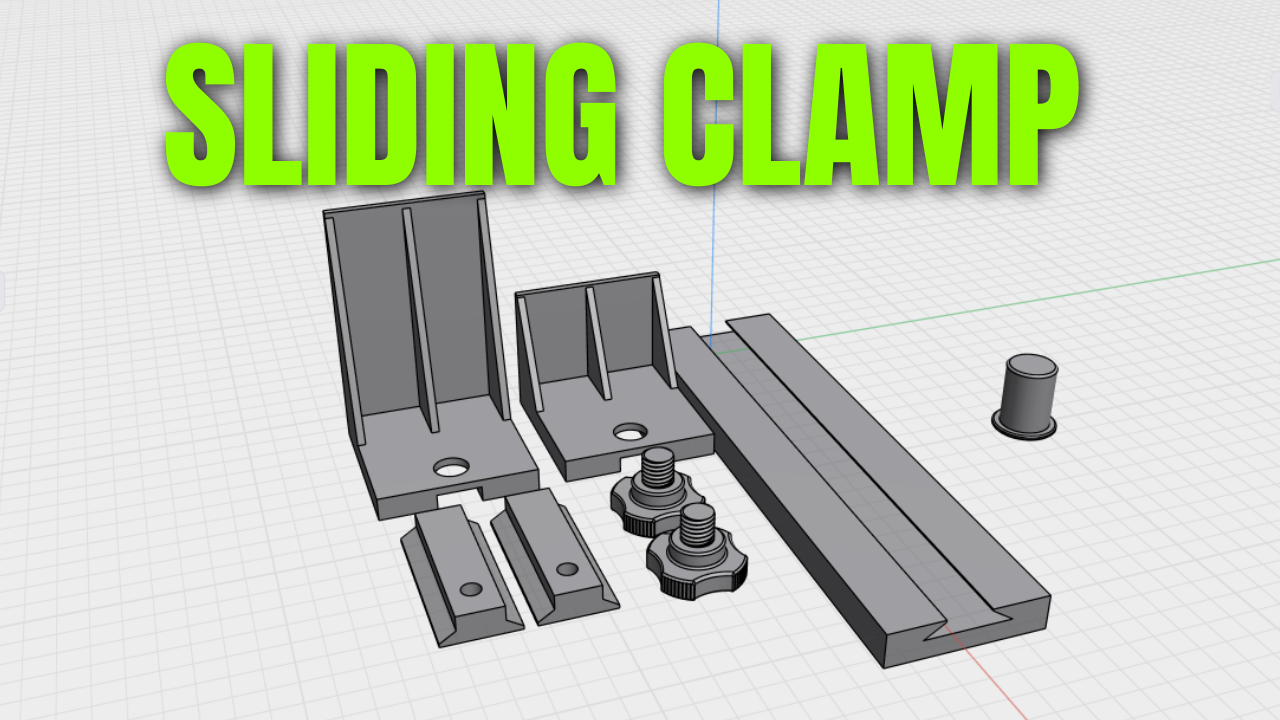 Image 2 of 10
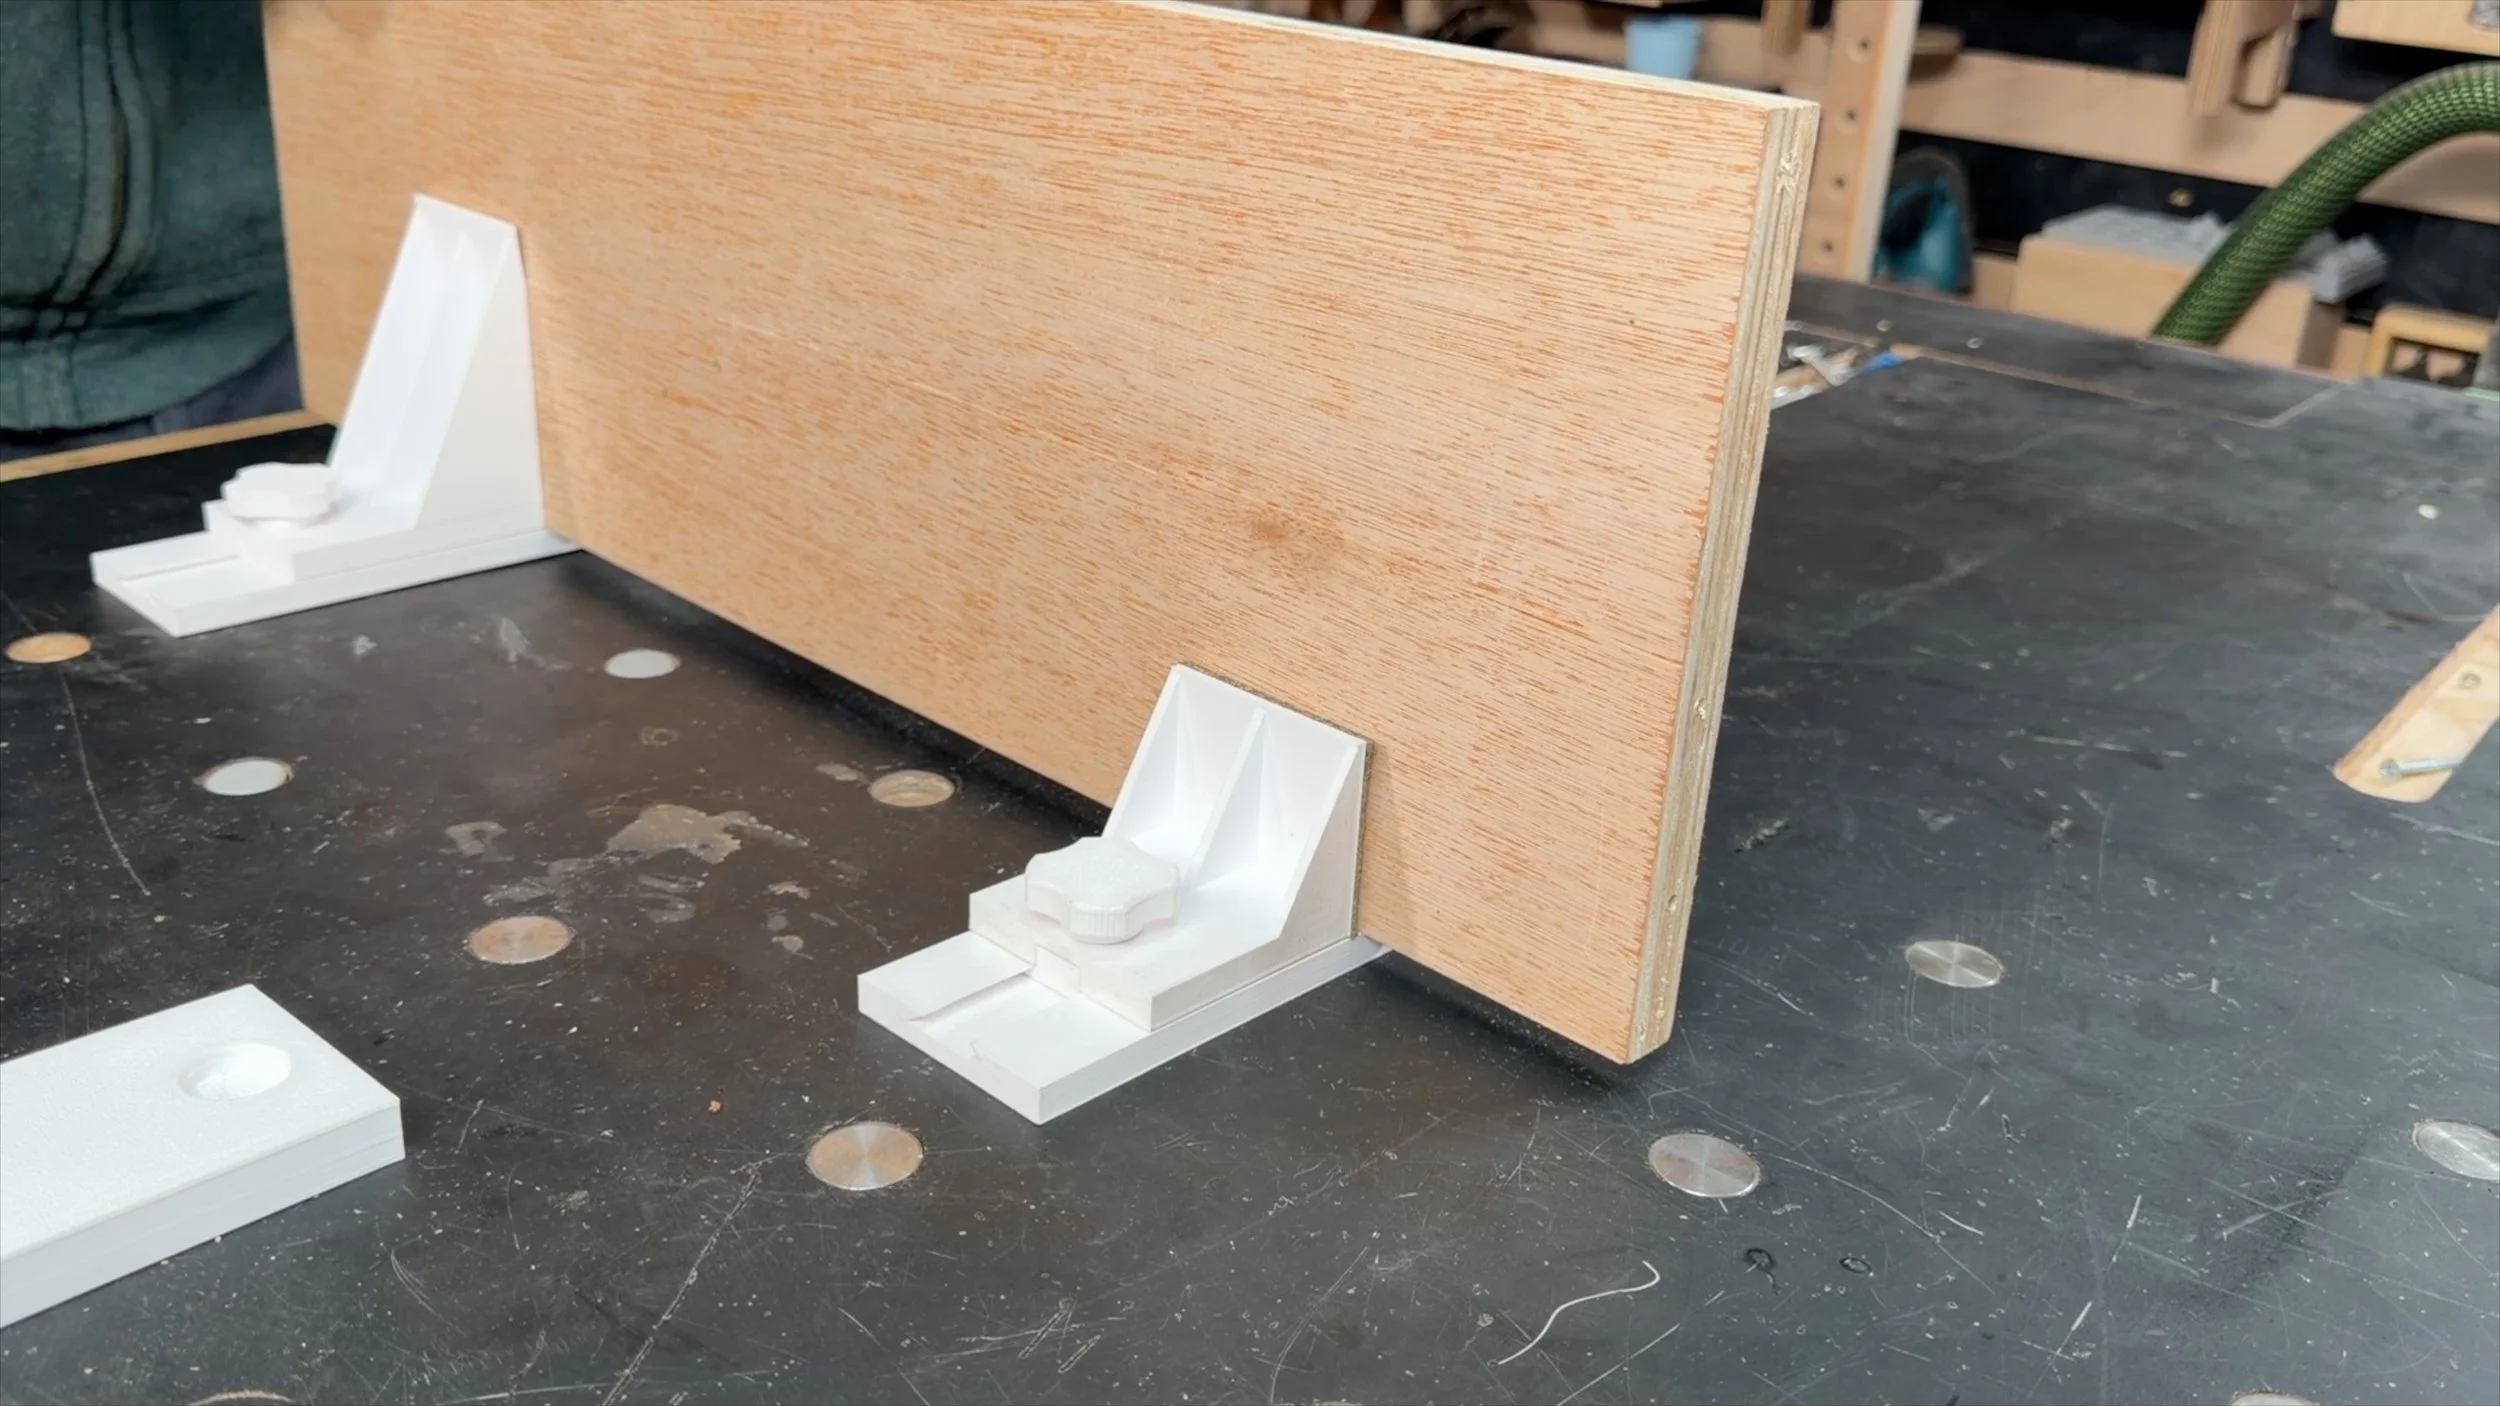 Image 3 of 10
 Image 4 of 10
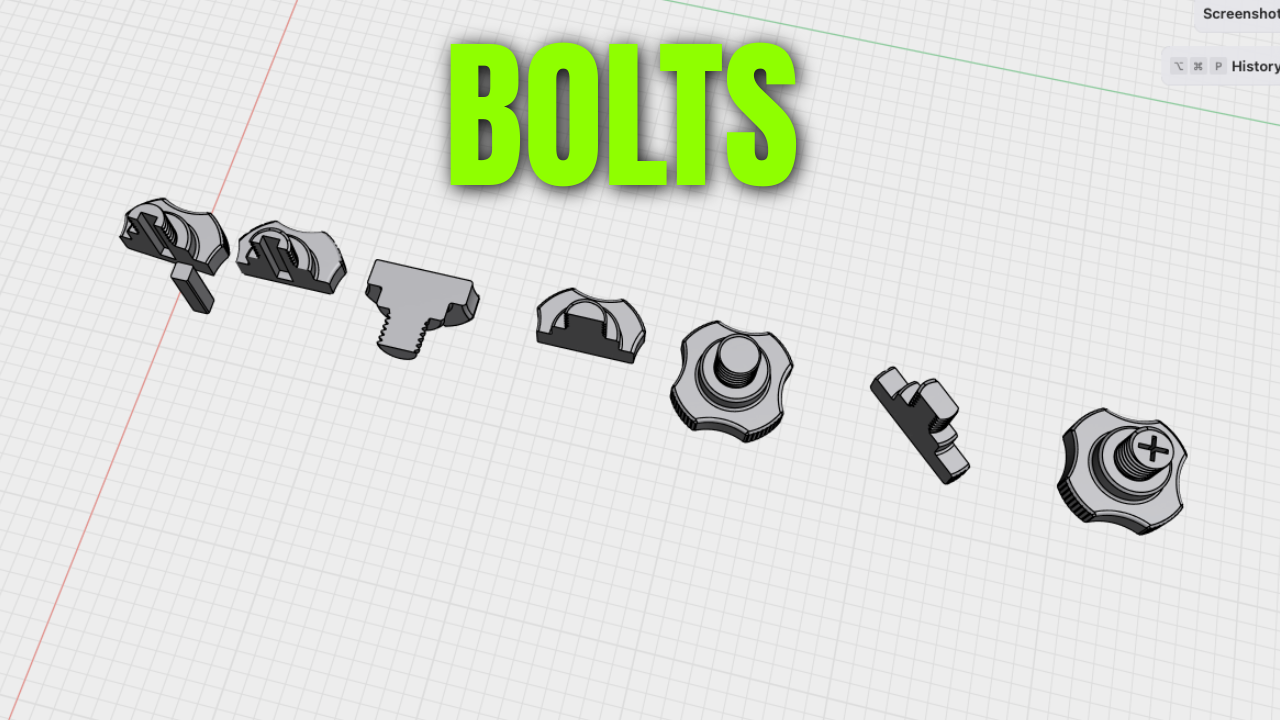 Image 5 of 10
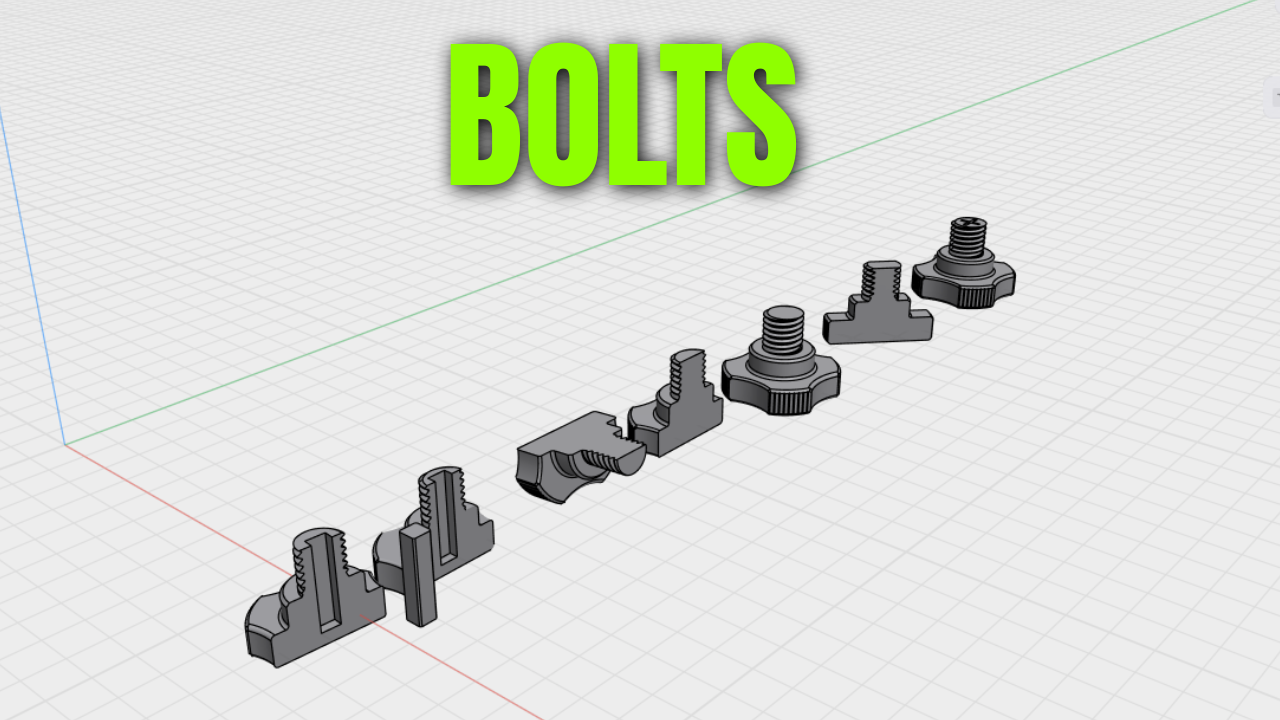 Image 6 of 10
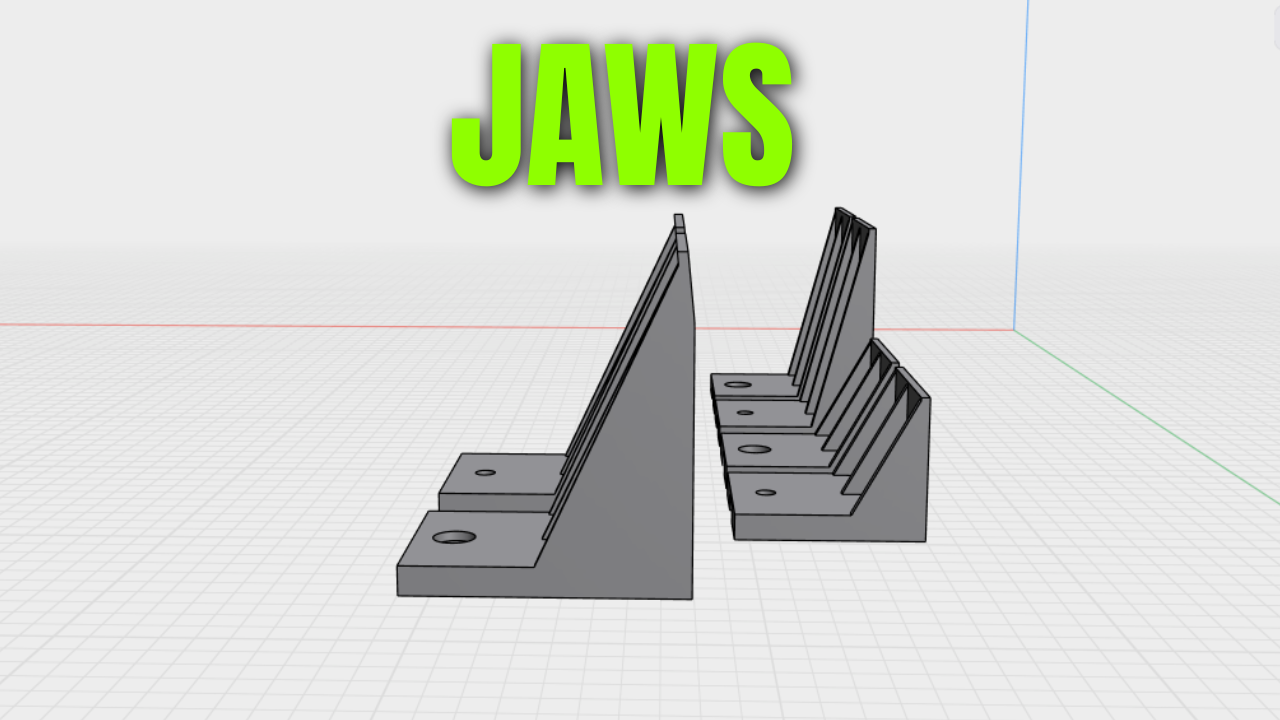 Image 7 of 10
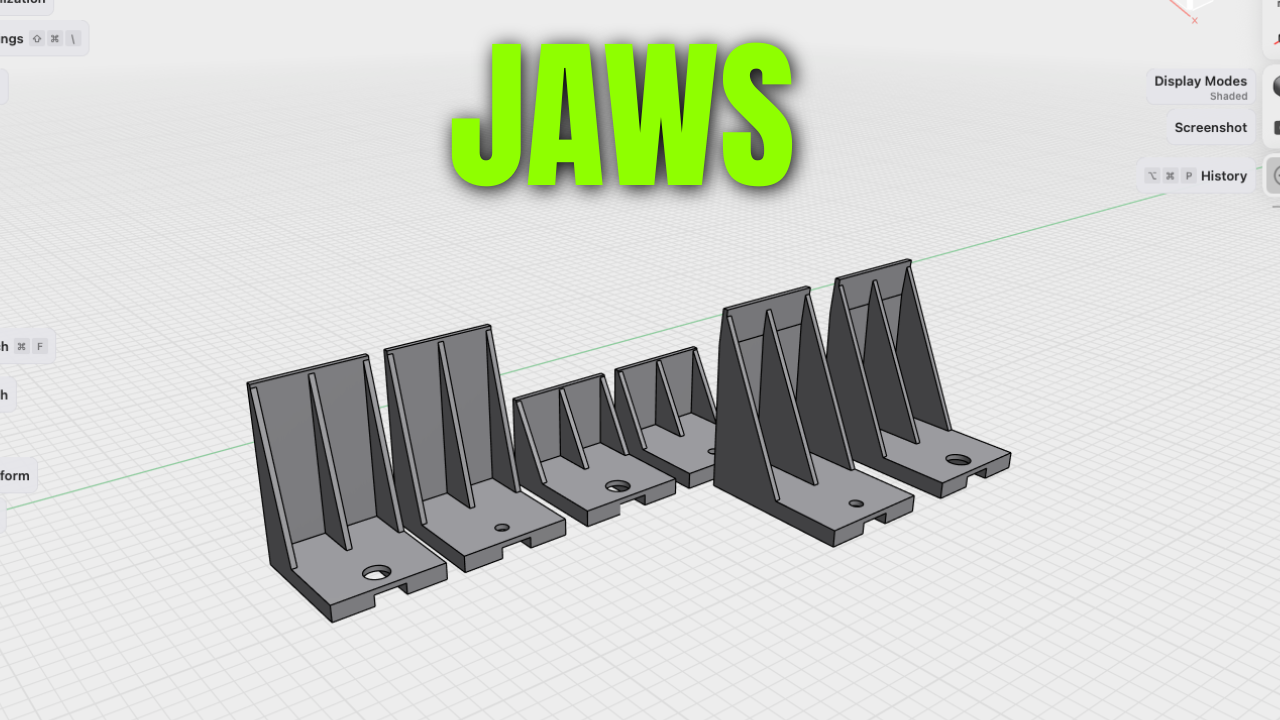 Image 8 of 10
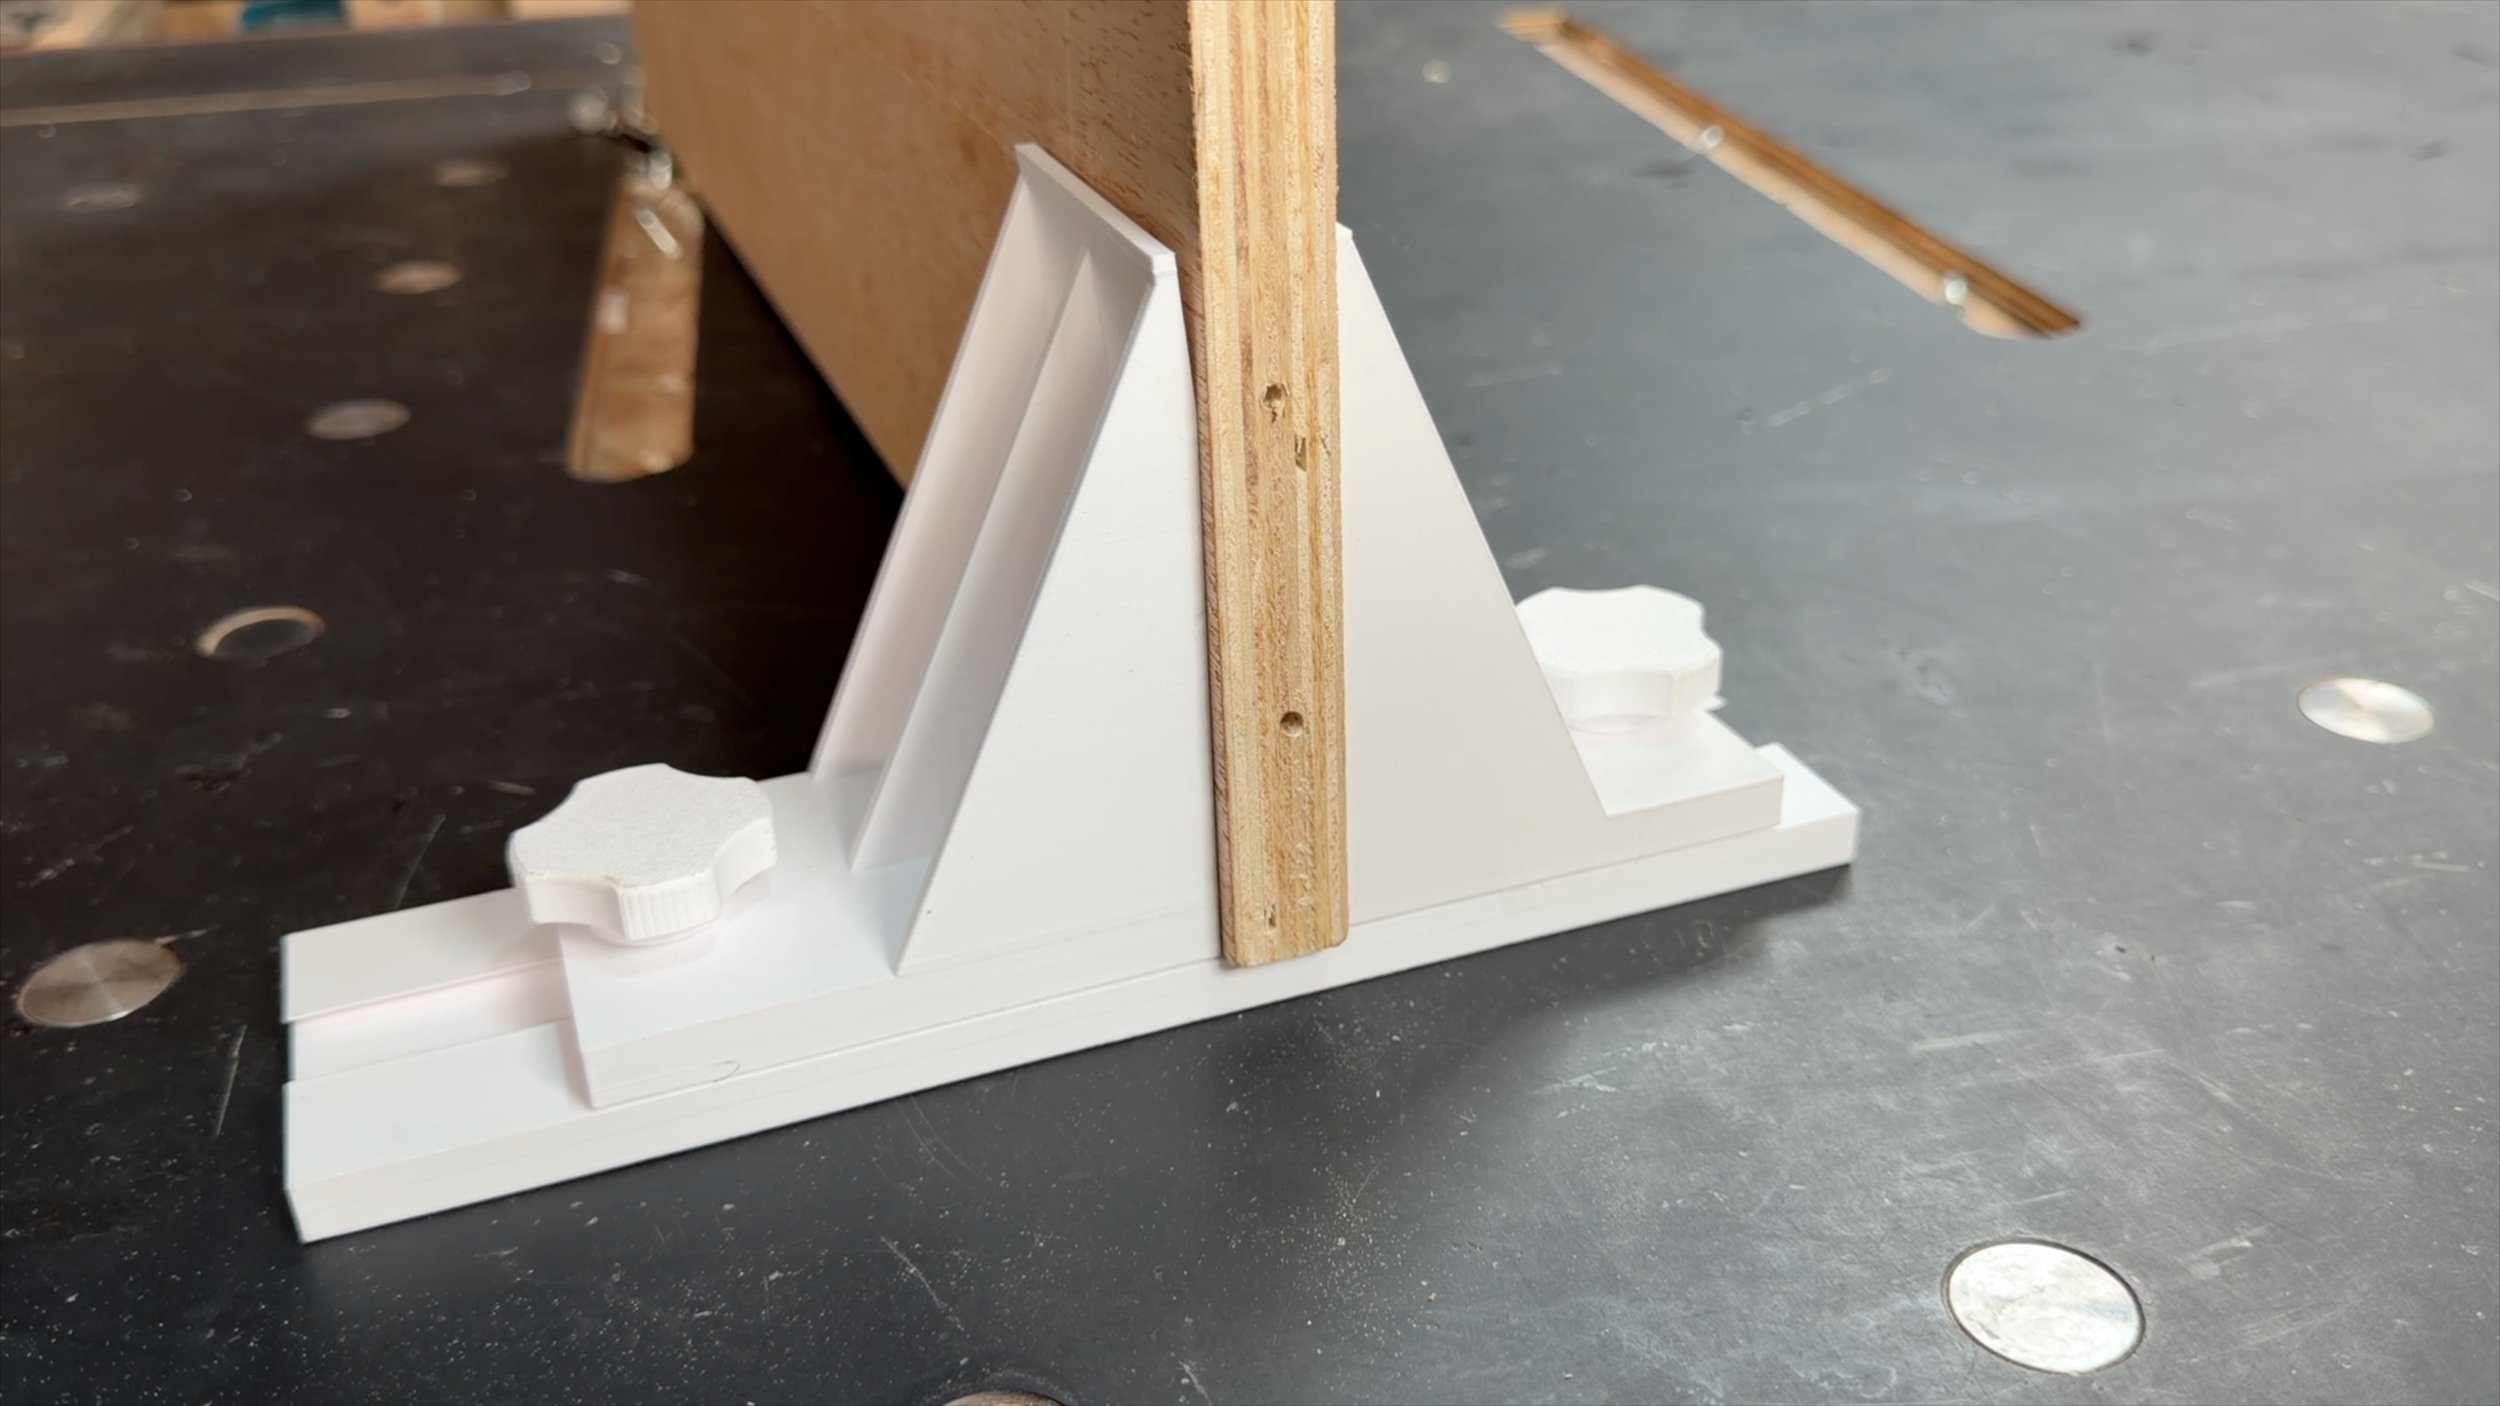 Image 9 of 10
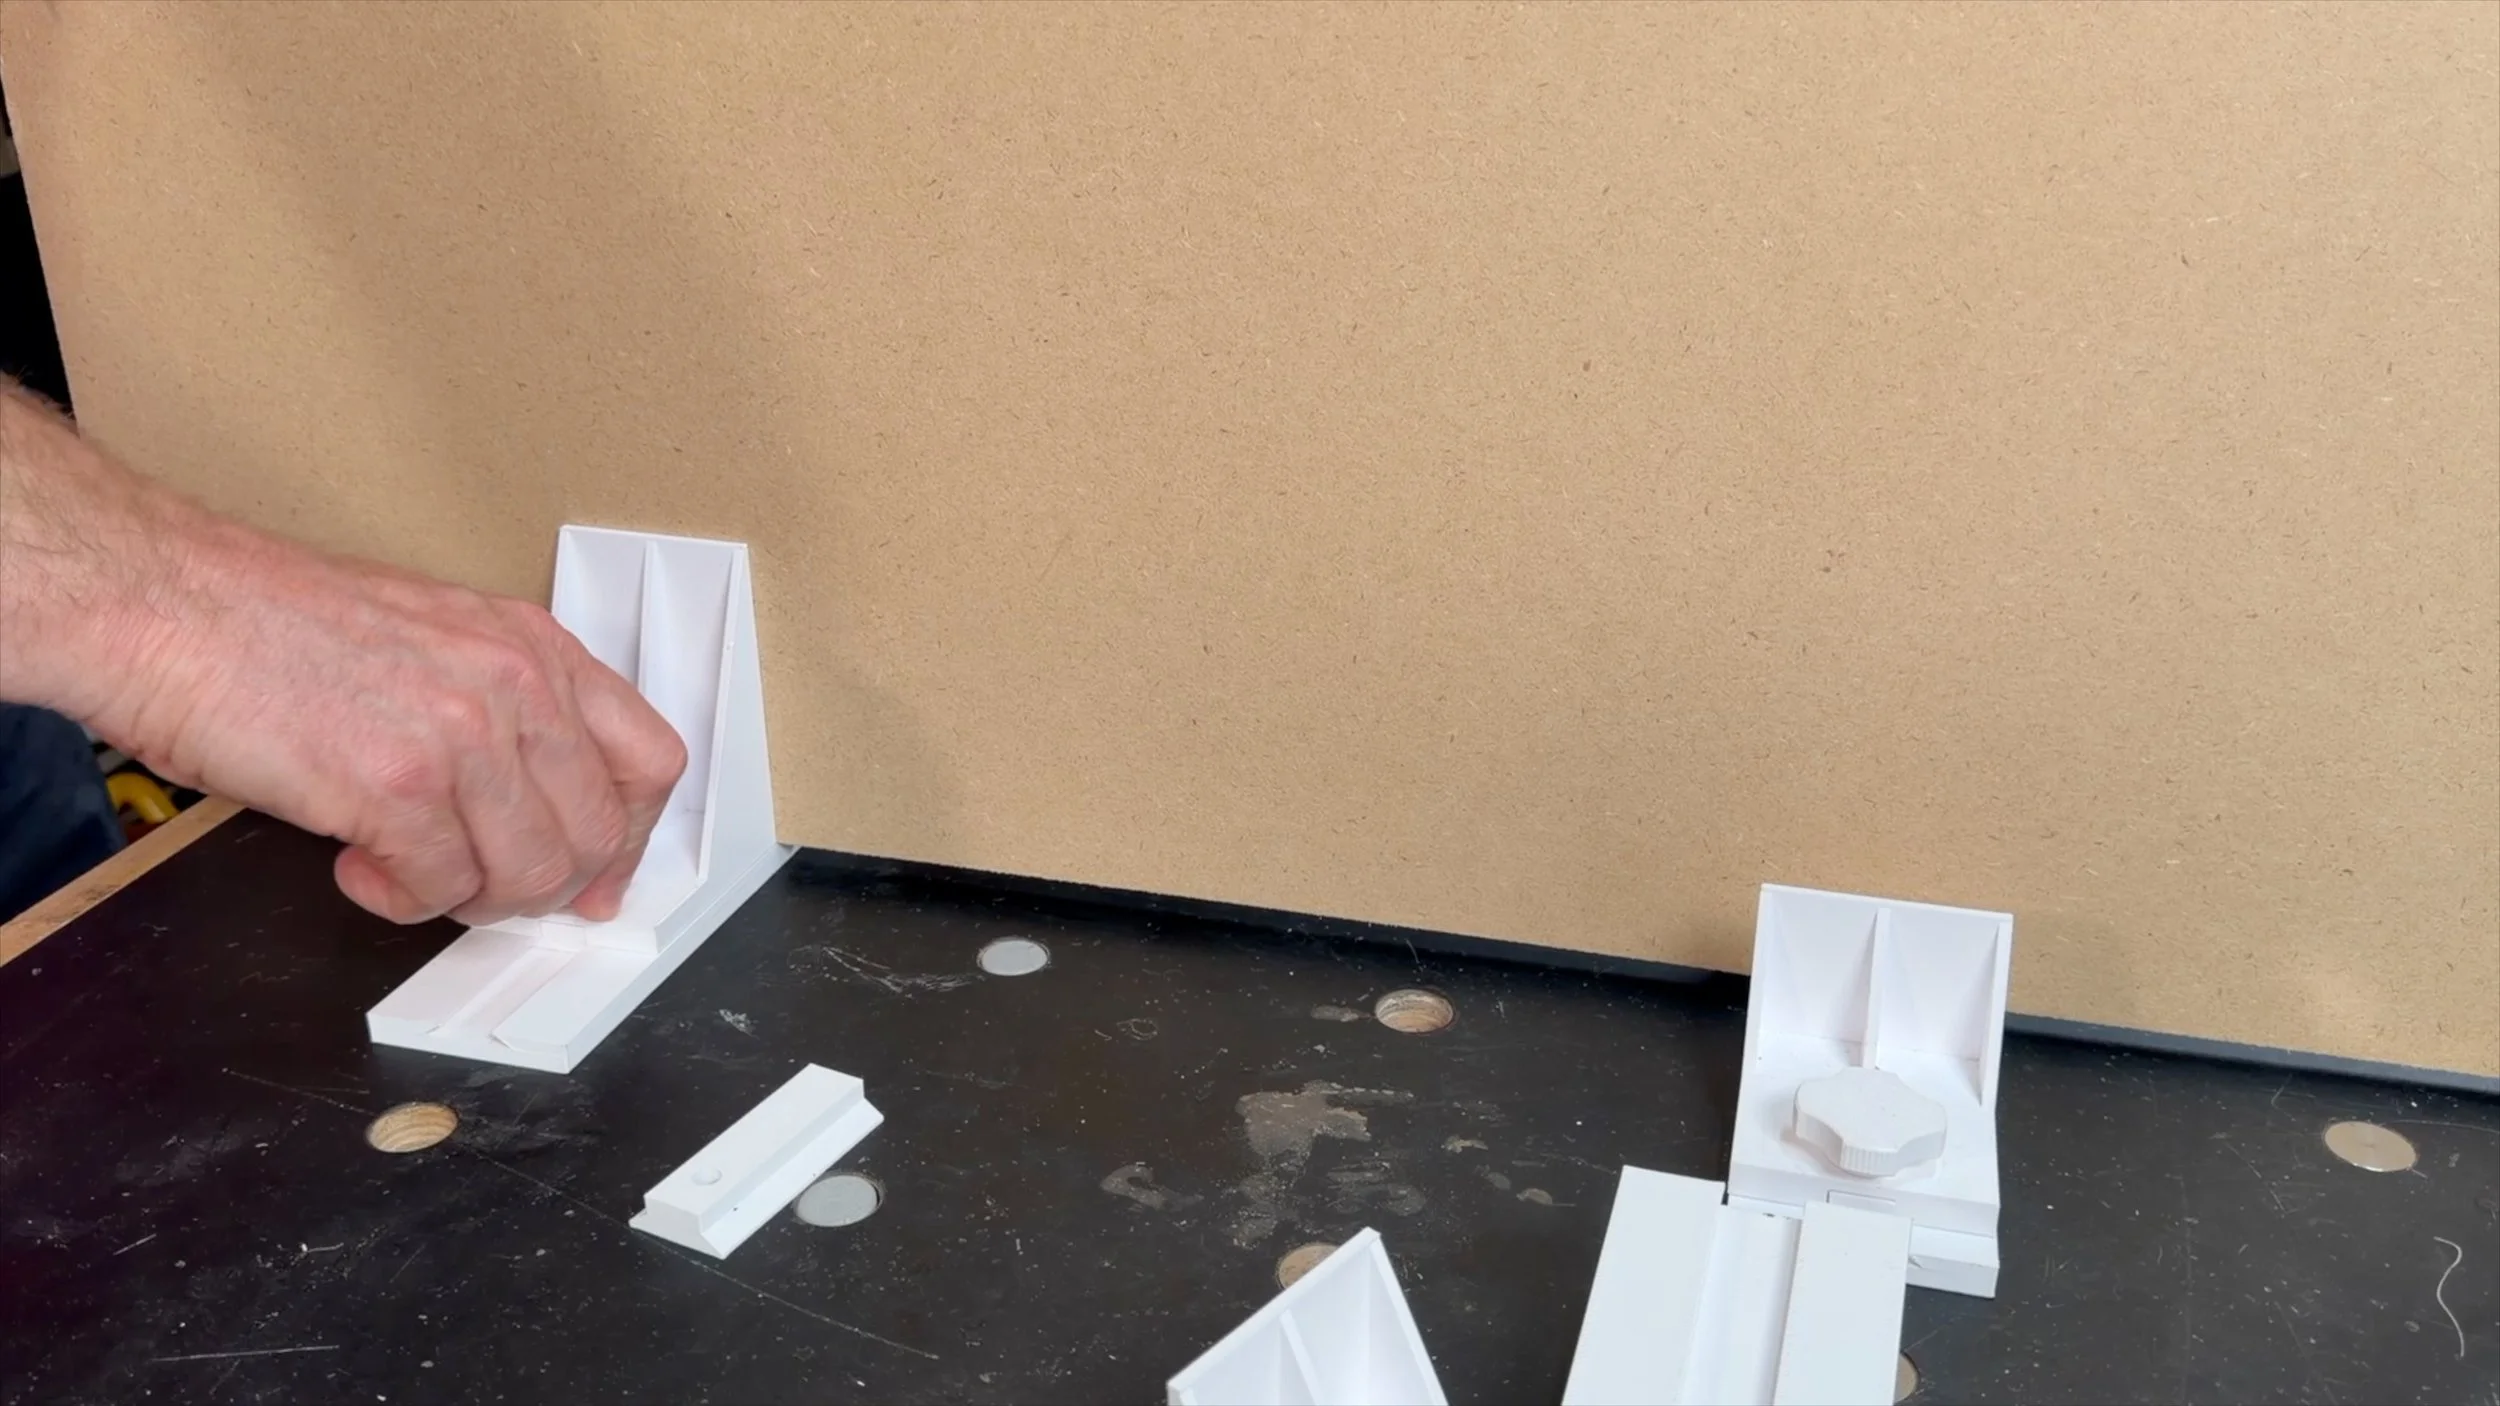 Image 10 of 10